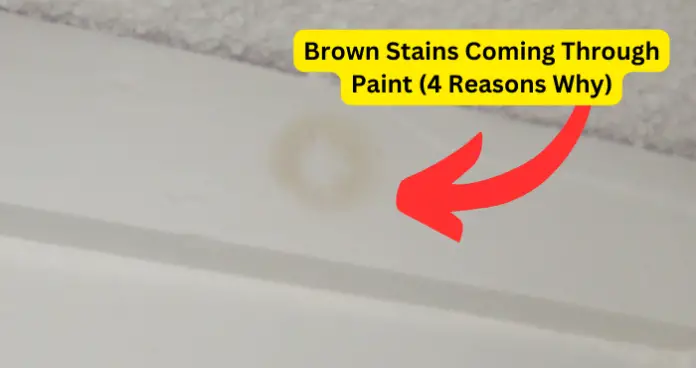
Brown stains coming through paint reduce the aesthetic value of your home. However, you do not need to replace your home’s entire paint to fix it. Instead, you need to troubleshoot the problem and address the specific cause of the issue.
The brown spots/stains can appear on the ceiling, on the wall, and around ceiling nails. Whether it is spotting or a big patch, there is an underlying cause that signifies a more complex problem. The extent of the problem depends on where the brown stains appear.
Here is a detailed process you can use to address brown stains coming through paint in your home.
Why Are Brown Stains Coming Through My Paint?
Tannin Staining
Tanning staining is tan or brownish discoloration on your home’s paint surface resulting from the movement of tannins from a substrate through a paint film. It mostly happens in staining timbers like mahogany, redwood, and cedar.
This staining can occur when you do not seal and prime surfaces adequately before painting. Other than this, it can also occur when you do not use a stain-resistant primer or when a lot of moisture escapes via your exterior walls. Moisture can transfer the stain to your paint surface causing brown staining.
Typically, tannin oil stains form a long linear shape
Fix – Use Solvent-Based Stain-Resistant Primer
Fix all causes of extra moisture. Clean your wall’s surface and apply good quality solvent-based stain-resistant primer on the wall. You can also use a water-based primer. However, if the extent of the stain is severe, it is prudent for you to use a solvent-based primer. In such cases, you may have to apply two primer coats. The second coat should be applied after the first one has dried completely. To top it all, apply a finishing coat of high-quality water-based paint.
When cleaning the surface, you will have to remove loose surface paint with a wire brush or scrapper. Alternatively, you can use oxalic acid to get rid of the stains. After that, rinse the surface thoroughly using water pressure washer. Let the surface dry for at least two days. The waiting period will depend on the prevailing weather condition in your location.
It is important to note that tannin staining is not a paint problem. Instead, it is a wall surface issue. Oil-based primers will take longer to dry when used in combination with tannic acid. Therefore, you will have to wait longer for oil-based primers to dry – up to 5 days or longer. In case staining starts before you begin applying the finish paint, you will have to sand the area and apply a new primer.
You will also likely see brown staining despite taking all precautionary measures because of tannin oil bleeding. As such, it is prudent for you to wait 12 months before repainting.
Surfactant Leaching
If staining is an eyesore, then you should be on guard against surfactant leaching. While this leaching is neither a threat to the surface nor the paint, it compromises the aesthetics you’ve worked so hard to achieve.
Surfactant leaching is also known as streak staining, exudate staining, weeping, streaking, or exudating. It happens when paint takes too long to dry due to poor drying conditions causing surfactants to migrate in high amounts to the paint film’s surface leaving sticky deposits or stains on painted surfaces.
In most cases, surfactant leaching happens in bathrooms and other humid areas in a house’s walls or ceilings. Stains resulting from this leaching might resemble water spots or stains. It is therefore important for you to distinguish between the two so as to deploy the right remedy.
Surfactant leaching happens when you use latex paints. This is because surfactants are a crucial ingredient of latex paint and are soluble in water.
Surfactant leaching can also be caused by condensed moisture and deeper tints. The former is mostly responsible for surfactant leaching in bathrooms and outdoor spaces, while the latter often occurs when deeper color paints are used.
Fix – Wash Off with Soapy Water, Repaint, and Wait for Weathering to Occur
Use a sponge, soap, and warm water to wash off surfactant leaching. However, you need to do this after the paint has completely dried. You need to be gentle while washing off the stain to protect the paint film against damage. If the film is uncured, you may have to wash the stain off more than once to avoid damaging the paint.
Repainting is not a solution by itself. However, when combined with washing off the stain, it delivers great results. Here, you need to wash off the surfactant stain with warm soapy water, let it dry properly then apply a coat of paint. Please note, for this to work, you must eliminate all the stains before painting.
Surfactant leaching occurring in the outdoor space is taken care of by weathering. Even though this might take slightly longer to get rid of the stains, it is an effective way to handle it without spending money on it.
Preventing surfactant leaching is the best way to deal with it. To avoid this leaching, you will need to buy top-quality paints, mix and apply the paint following the manufacturer’s preparation and application procedures. Where possible, ensure night and daytime dewpoint and temperature are within acceptable limits for proper drying. You should avoid doing activities that might affect temperature and moisture composition within your home as the paint dries. Finally, ensure your home has proper ventilation to achieve the required indoor temperature and humidity.
Water Stains
Water drips or leaks can leave brown stains on your wall or ceiling. When this happens, you need to find out the cause behind the leak before taking your paintbrush.
Water stains on your wall or ceiling can indicate a serious underlying issue. When troubleshooting the stain, you should be guided by the location of the stain. For instance, if the water stain is on the ceiling, it could indicate a leaking roof. Other causes of water stains on your paint are leaking pipes, loose window/door seal, and crack in walls. You may have to enlist the service of a professional to identify the cause of water leaks in your home.
Fix – Address the Underlying Issue and Repaint
After determining the cause of the water stain, you need to address the underlying issue before repainting. This will ensure the issue does not reoccur when you apply a new coat of paint.
Clean the surface by removing the old paint. Remove molds that might have started growing on the surface by using a mold remover. Dry the area completely while at it. Use a dehumidifier to hasten the drying process. Check for signs of dampness after drying the surface. If present, you might not have addressed the underlying issue exhaustively. It is important for the surface to be completely dry before you apply a new coat of paint.
Apply primer as the final step in the repainting process. Use a good quality anti-stain primer to block off any water stains. This will protect your new coat of paint from showing stains.
After applying a primer, you need to repaint the whole surface. Do not paint the affected area only as this will leave a patch on the surface of your wall or ceiling. The patch will be easily noticeable and have a negative effect on the eye.
Here are some tips that you should pay attention to when dealing with brown water stains on your wall:
- The underlying issue is to blame. Find it and fix it before fixing your paint problem.
- Fill cracks on walls or ceiling. Clean and dry the surface.
- Prime the surface using high-quality stain-resistant primer.
- Paint using high-quality paint
Dust and Dirt on Walls
Dust and dirt can build up on your wall surfaces to cause staining. This coupled with insect droppings, your wall may develop a brownish stain that undermines the aesthetic value of your interior finish.
Fix – Wipe Off with a Clean, Moist Cloth
Staining due to dirt and dust is easy to get rid of. All you need is a clean, moist cloth to wipe it off. However, you should assess the paint used on your surface before attempting to clean it. Some paint may come off when wiped with a moist cloth.
If the staining was caused by dust, you might need to dust it off using a dry cloth.