Frozen pipes or hoses are never a good thing since they can lead to a number of damages, such as pressure leaks. If you do notice that your washer drain is frozen, there are a few things you can do to fix it.
Why Is My Washer Drain Frozen?
While there are not many reasons why your washer drain keeps freezing; however, the main and most common reason for this freezing to reoccur is typically the temperature of the room in which you keep your washer in, along with the water that might still be inside the washer.
Let us review some of these possible reasons and what you can do to both prevent and fix the problem with your washer drain freezing.
1. Temperature Too Low In The Room/Area
As previously alluded to, one of the most common causes for your washer drain freezing is the temperature of the room in which you keep your washer, along with what excess water is still in the drain pipe or drain hose which under the right circumstances, can turn into ice.
Now, not all of us took Science class; however, when water enters the freezing point, the water particles expand and this is what can cause severe damage to your washer’s draining components such as the drain hose/pipe and or valves.
This can happen if you tend to keep your washer in exceptionally cold areas such as your shed, garage, outside, or even in a travel trailer. All of these areas typically experience quite low temperatures, which can and will lead to your washer drain freezing up.
Earlier, we mentioned when water reaches the freezing point it expands, which also makes it helpful to know the freezing point of fresh water.
The freezing point of fresh water is 32 degrees Fahrenheit, so if you keep your washer in a room or area that reaches this temperature, this is likely why your washer drain keeps freezing.
Now, the extent of the damage that the leftover water in the drain hose or drain pipe will inevitably cause depends on how much water is left in the drain hose/pipe.
This is because the water will expand inside of the drain pipe or drain hose and can cause pressure cracks or breaks.
When this happens, it is unfortunately very possible that your washer machine could become damaged beyond the point of repair, which is all the more reason to ensure that your washing machine is in an area of appropriate temperature.
Fix – Move Washer To Warmer Area
If you believe that the temperature is responsible for the leftover water freezing inside the washer’s drain hose or pipe, you should move the washer to an area that will not get as cold.
If your washer is in a shed and you do not want to move it, you could also insulate your shed building better, this includes insulating the drain hose or pipe. When you insulate your drain hose or pipe, it can help to prevent the drain hose/pipe from freezing.
Luckily, you can find many affordable options for washer hose/pipe insulators on Amazon. However, you can also move your washer to a warmer and more suitable area, but you will also want to do this in steps, which we will provide below.
To Move A Washer:
Caution: You should turn off the power to the washer, which you can do by flipping the breaker to “Off” in the breaker box. This way you will not have to worry about being accidentally electrocuted while you are disconnecting the water lines. Also, be sure you unplug the electrical cord from the outlet before turning the breaker back on.
Step 1. The first thing you will want to do is drain your washing machine. To do this, you will need to locate the water supply valve and turn off the water supplied to the washer.
Next, you will want to remove the large (typically plastic) drain hose and if you believe there is frozen water inside of it still, you can leave the drain hose in a safe area with direct sunlight on the hose (for any portions that can reach).
If the drain hose does not have frozen water inside of it, you will still want to put it in a sink or bucket so it can drain any excess water left in the hose.
Keep in mind, that is a good idea to let your washer dry with the lid open for at least 24 – 48 hours.
If you are worried about any water still being left in the washer, you can also set your washer to the spin cycle option, which will drain out any excess water in the washer and the water will be expelled through the drain hose into the bucket or sink.
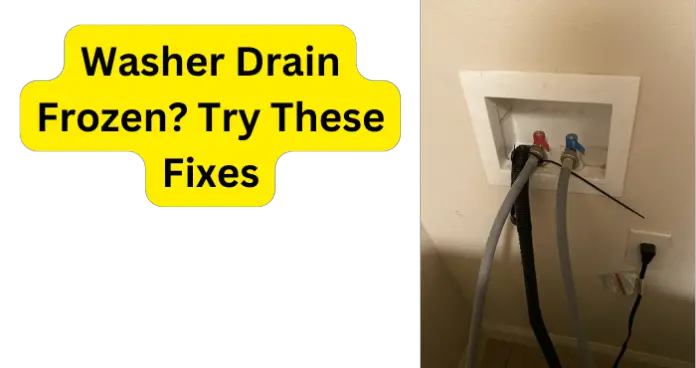
Step 2. On the back of your washer machine, you should also find two inlet hoses, one hose is for hot water and the other is for cold water.
Be absolutely sure you have turned off the hot water and cold water supply for the inlet hoses, after you have checked to make sure both water supplies are off, you can disconnect both of the inlet hoses from the washer.
Typically you can remove these inlet hoses without any tools needed; however, some washers may require an adjustable wrench.
Once you have disconnected each of the inlet hoses, you will want to put them in a laundry sink or a bucket so that any water left in them is drained out.
After the inlet hoses have dried, you can put them in a bag for easy moving.
Unfortunately, the drain hose will remain attached to the washer; however, you can tape it to the washer or tie it with rope so that you can move the washer without the drain hose receiving potential damage.
Step 3. Now to move your washer, you will need an appliance cart or a furniture dolly, this way you do not kill your back trying to move the washer. You can find a Shoulder dolly (view on Amazon) or an Appliance Cart (view on Amazon).
You will want at least two people to help lift one side of the washer so that you can get a furniture dolly or appliance cart underneath the washer machine. You should have one person hold the cart in place and pull the washer, while the other person pushes and lifts the washer onto the appliance cart.
Now, you can strap the machine to the cart with appliance or furniture straps, which you can also find on Amazon. Now you should be able to move the washer fairly freely.
Step 4. Once you have your washer in the new area you have selected for it, you can reverse these steps to set it back up correctly. Once you have done that, you can return to the breaker box and turn the breaker back to “On.”
2. Winterize Your Washer/Drain Hose
You may or may not be familiar with the term “winterizing,” which essentially means protecting your washer and all of its connections including hoses from freeze damage. You will likely be familiar with this if you have your washer in an RV or travel trailer.
As we explained in the last segment when your washer is in an area with cold enough temperatures, the water inside of it and inside of the drain hose/pipe will freeze and consequently expand.
This means you will want to insulate the drain hose for your washer and you can also use an antifreeze product for inside your washer to essentially protect and preserve it against freeze damage.
Fix – Use Hose Insulator / Use Washer Antifreeze
In order to best protect your washer’s drain hose/pipe. To put the hose insulation over your washer’s drain hose/tube, you will only need to disconnect one end and slide the insulation over the washer’s drain hose/pipe.
Another viable option when trying to protect your washer and its drain hose/pipe is to use RV and marine antifreeze, which will help you winterize your washer and protect it from freezing when it is exposed to very cold conditions.
Not to mention that this could also save you money on potential washing machine repair costs, as it does what antifreeze does best, prevents things from freezing.
This includes any excess water that may be left in your washer’s drain hose/pipe since this water can become frozen and in turn, the water will also expand, which can potentially lead to leaks, pressure breaks, or worse.
Washers and their accompanying tubes and hoses can be quite tricky to not only maintain but to also repair, which is why it is a good idea to take all of the proper precautions to ensure that these hoses and pipes will not freeze.
This especially applies when you have to keep your washer in an exceptionally cold area such as outside, in a garage, or in a not-so-insulated shed.
However, if you do take the proper precautions, it will be much less than you have to worry about in the future. Plus this can also save you on potential repair costs.